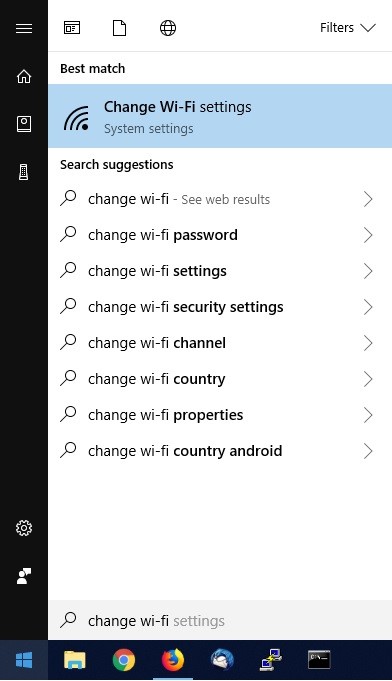
Step 1: From your desktop, left click on the windows icon in the lower left side of your screen, and type ‘Change wi-fi’. This should be the first option that appears. Left click on it.
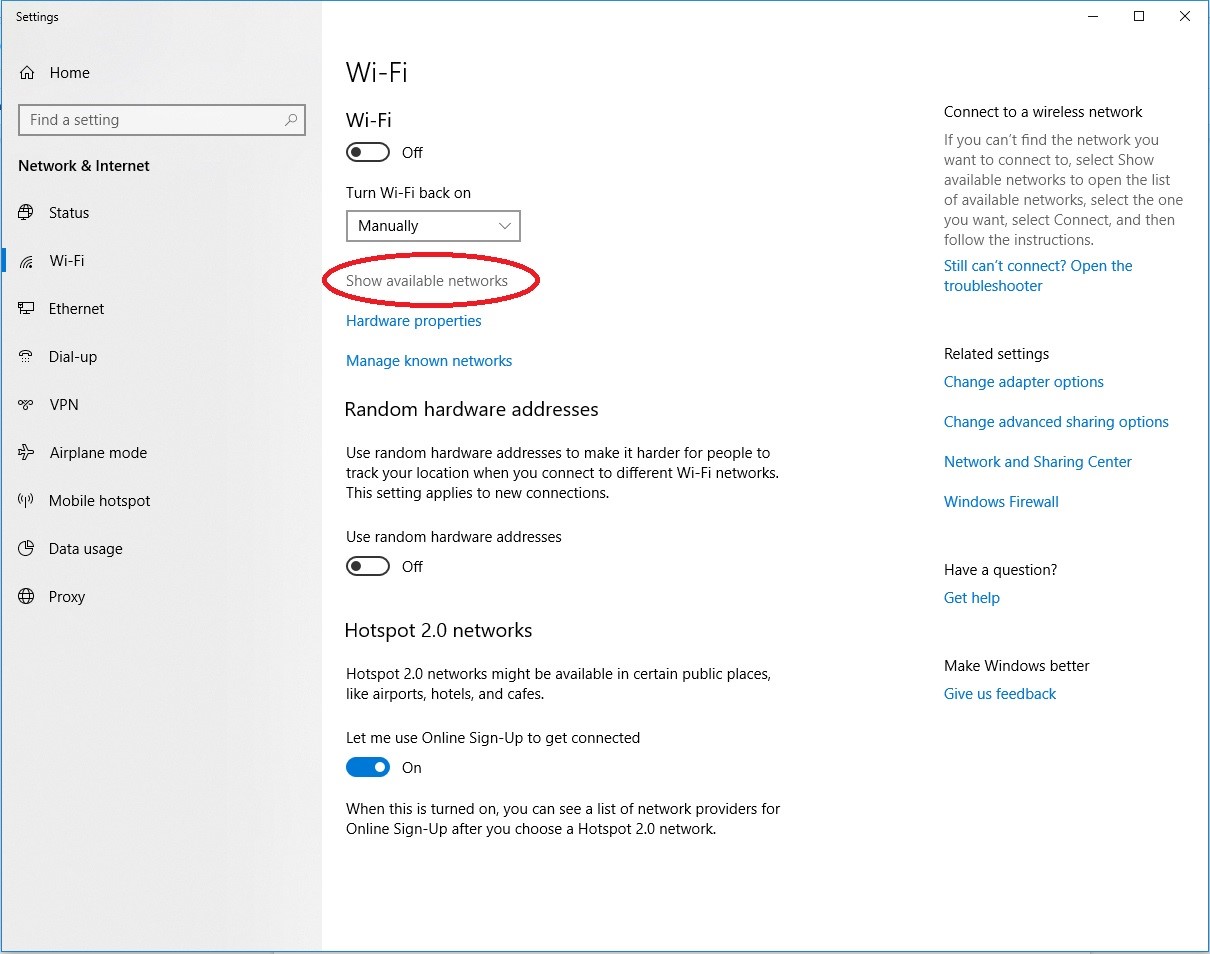
Step 2: Left click on ‘show available networks’
Note: if your wi-fi adapter is disabled, you may need to re-enable it via a slider on your laptop, or in the software by left clicking on the wi-fi icon that will pop up in the lower right as seen here:

Step 3: Left click the dc-wildcat SSID from the window in the lower right
Step 4: Left click on ‘Connect’ when the dc-wildcat SSID is highlighted. Optional: left click the checkbox for ‘connect automatically if you always want to connect to dc-wildcat (recommended).
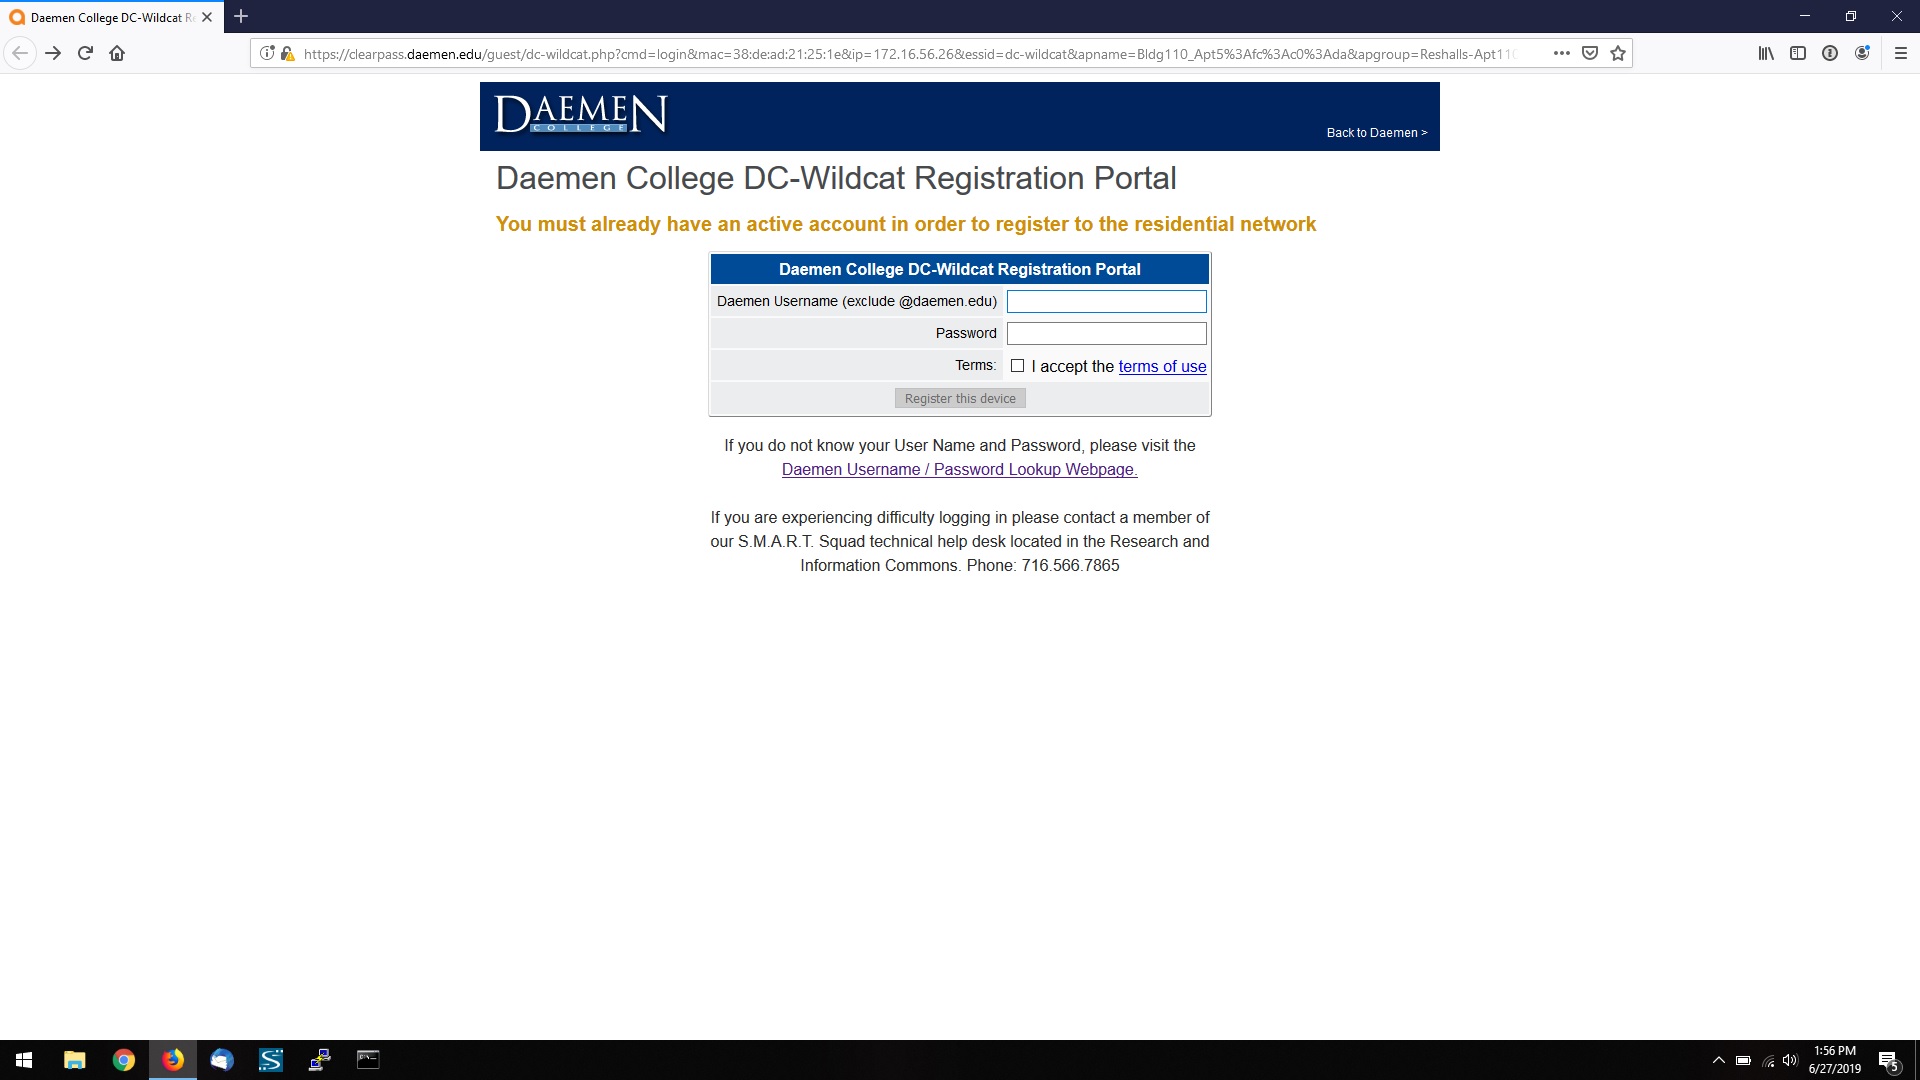
Step 5: You should receive a popup requesting you enter your Daemen credentials in order to use the network:
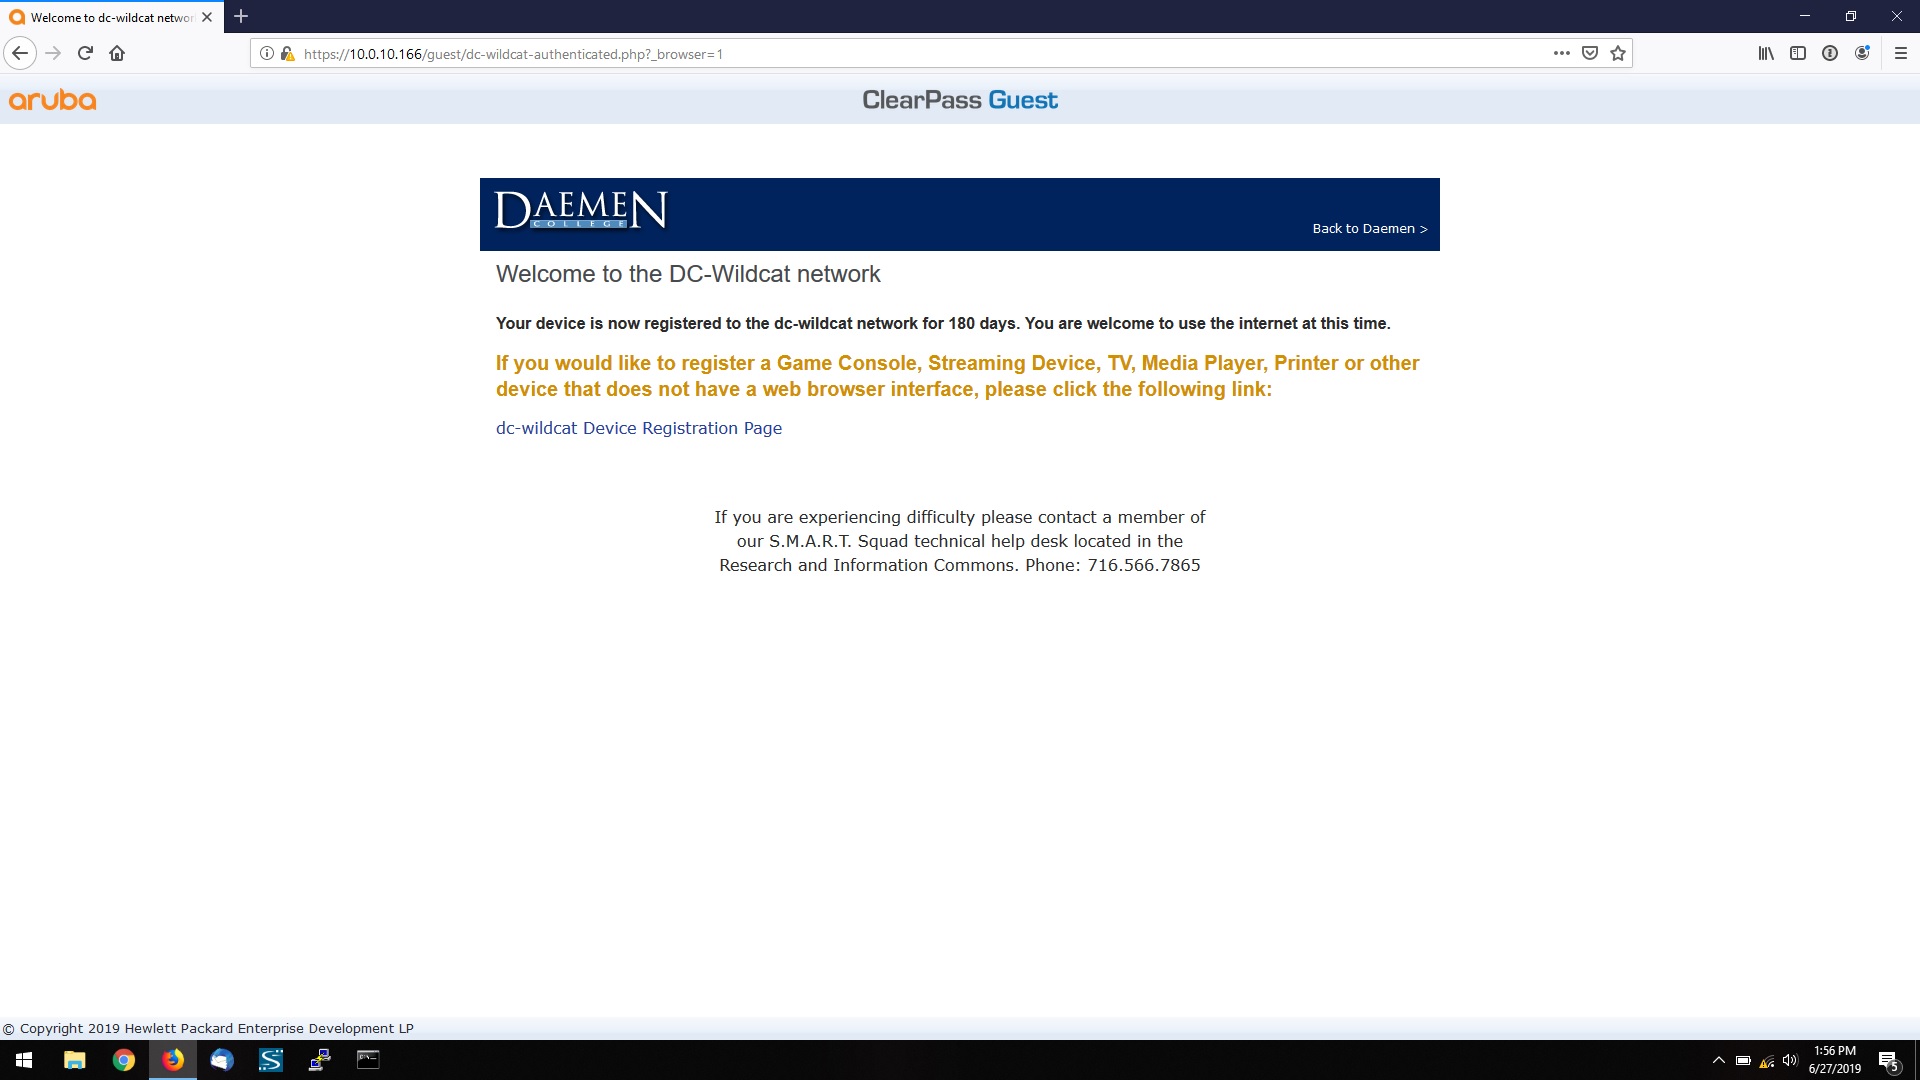
Step 6: Once registered, you should receive a confirmation screen. Please note this process can take up to 30 seconds:
Troubleshooting: If you input an incorrect username or password, you will be prompted to re-enter your authentication credentials. If you cannot connect to the dc-secure SSID, please contact the SMART Squad at (716) 566-7865.